

Table of Contents
It's extremely frustrating when an email service provider (ESP) interferes with the content you create or crave. Fortunately, there's an easy fix.
Learn how to safelist newsletters and other trusted senders and take control over what makes it to your inbox.
Readers, use this article to keep your inbox safe and organized. Keep the bad out without denying yourself your favorite publications. Creators, mark this easy reference for the next time someone says, "I'm just not getting your newsletter." Now, they will.
The Importance of Safelisting Emails
What is the main function of a safelist?
To keep both senders and receivers safe and informed.
People receive a lot of spam emails. Due to varying definitions, estimates for the percentage of email traffic occupied by spam range from 45-85%. This is a potential security issue, as well as a nuisance.
In response, ESPs work to ensure that their users receive the most relevant, desired emails while spam and low-quality promotional messages get filtered. They perform a constant balancing act in the background.
Most users never consider this process until something goes wrong and the events of email are disrupted. For example, a message they want to receive gets lost in the spam filter.
Safelisting tells your ESP that a sender is okay. It ensures that you receive emails from people you know and brands you trust.
Adding a Sender to Your Contact List
One of the easiest ways to safelist senders is through your list of contacts.
How do I safelist a newsletter?
It's simple. The major ESPs all allow you to store contact information. If you're missing essential emails, consider adding that address to your contact list. Your ESP will ensure that their communications make it to you.
For example, if you use Yahoo! Mail, you would sign into your account and add the email address (e.g., [email protected]) to your contacts.
First, click on the contacts icon:

Then, click "Add a new contact," and enter the sender's information.

For some ESPs, the process is even more streamlined. Try hovering over or right-clicking on the sender's name in the "From" field. If an option to "create contact" pops up, simply click it.
Safelisting in Gmail
What is safelisting email in Gmail? It actually takes a couple of different forms. Here are the two top methods you can use to safelist senders if you don't want to create a contact for them.
Marking Messages as ‘Not Spam’
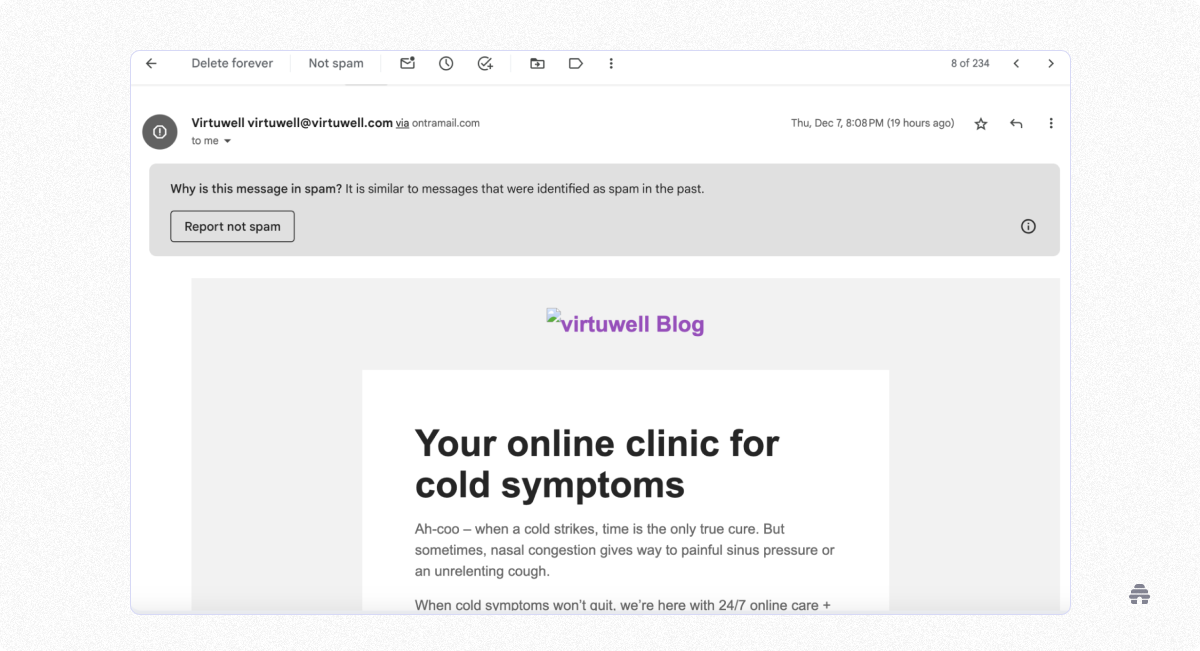
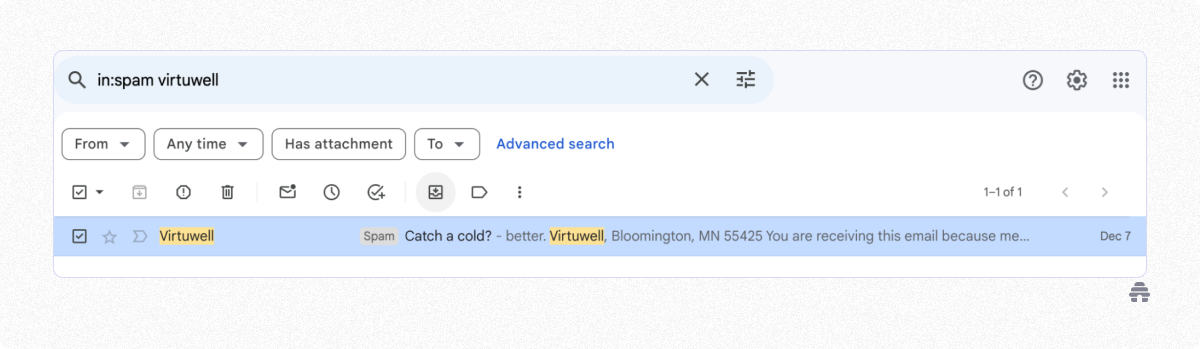
Looking for a message you should have received? Check your spam folder and search for the sender. If you find an email from the sender in question, mark that message as not spam or send it to the inbox.
One option is to click on the email when you find it. Google will tell you why it has been marked as spam, and you can click on the handy button to change its status.
Alternatively, you can select all of the emails from that sender and move them to your inbox.
Creating a Filter for the Address
The other option is to create a filter. It's a little trickier but guaranteed to end the problem for good.
To add a filter:
Click the gear icon in the top-right corner and then on the "See All Settings" button at the top of the pulldown menu.
Click on "Filters and Blocked Addresses" and scroll to the bottom of your list of active filters (if you have any).
Click on "Create a new filter."
Enter the domain of the email you want to safelist in the From field.
Click "Create filter with this search."
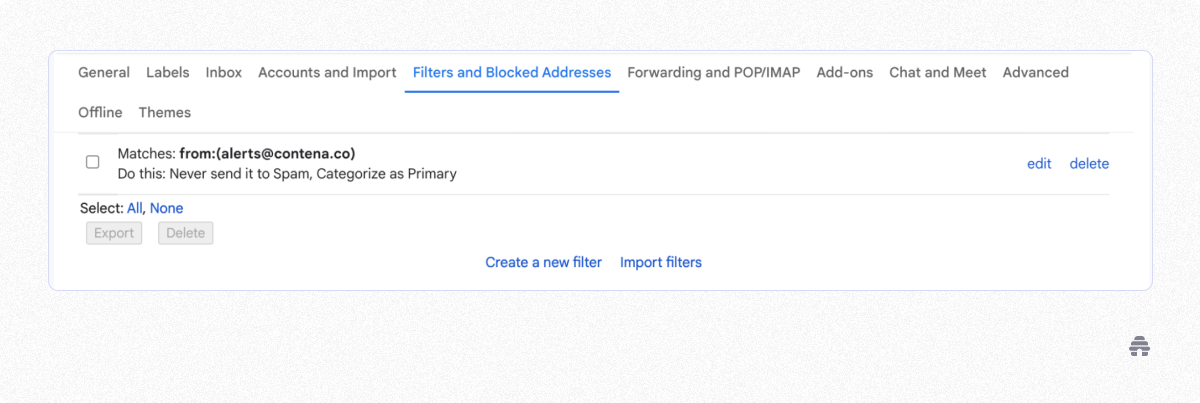
In the box headed "When a message is an exact match for your search criteria":
Click next to "Never send it to spam."
Click next to "Categorize as," and select "Primary" from the menu.
Click the “Create filter” button.
Safelisting in Apple Mail
The process looks a little different depending on whether you're on a desktop or using the iOS app.
Adding a Rule on Your Desktop
First, let's go over how to safelist from your computer. Sign into your Apple iCloud account and click on "Mail."
Select "Preferences" from the menu bar in the Mac Mail app.
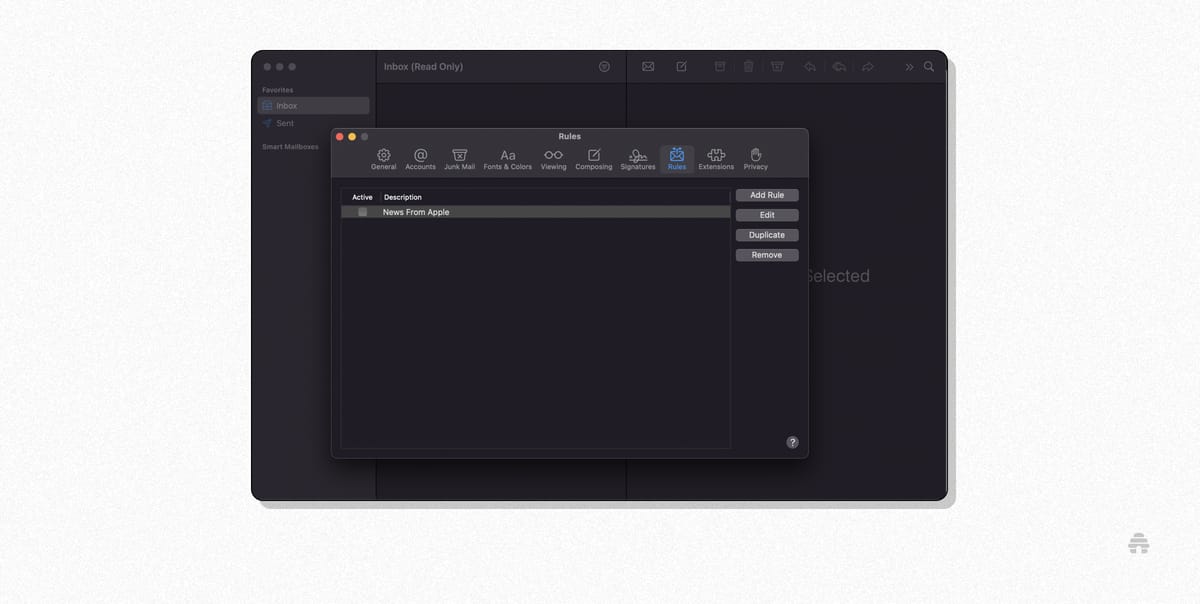
Click on the "Rules" tab and then the "Add Rule" button.

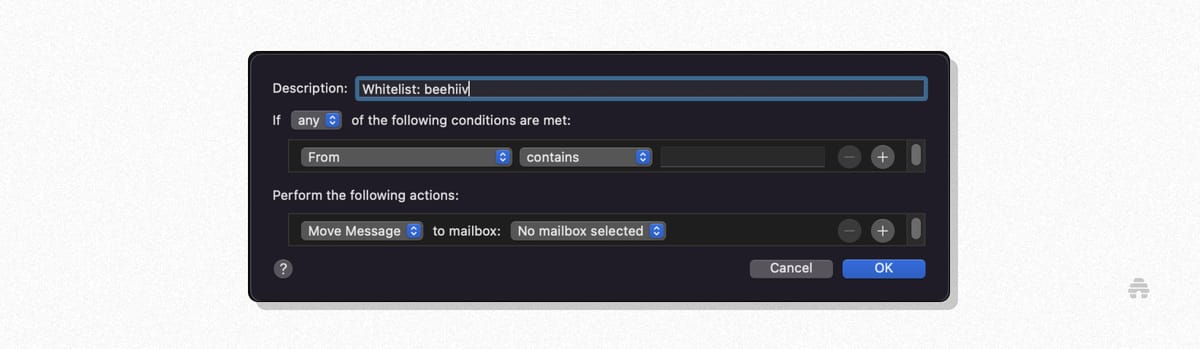
Name the rule in the "Description" field. For example, if we wanted to safelist beehiiv senders, we might type in "safelist: beehiiv."
The conditions lines should read:
If any of the following conditions are met
From, ends with (or contains)
Then, enter the domain name you want to safelist. Add an @ sign to make the filter domain-specific. For example, to safelist all mail from the beehiiv.com domain, type "@beehiiv.com" into the field.
Under "Perform the following actions," select "Move Message." Next to "to mailbox," select "inbox" or a different target folder.
Save this rule by clicking the "OK" button.

Sorting Mail on the iOS Mail App
It's a little easier to safelist senders on the iOS app.
Open the Mail App.
Select the relevant mailbox you want to search.
Open up the Junk folder and select the desired email.
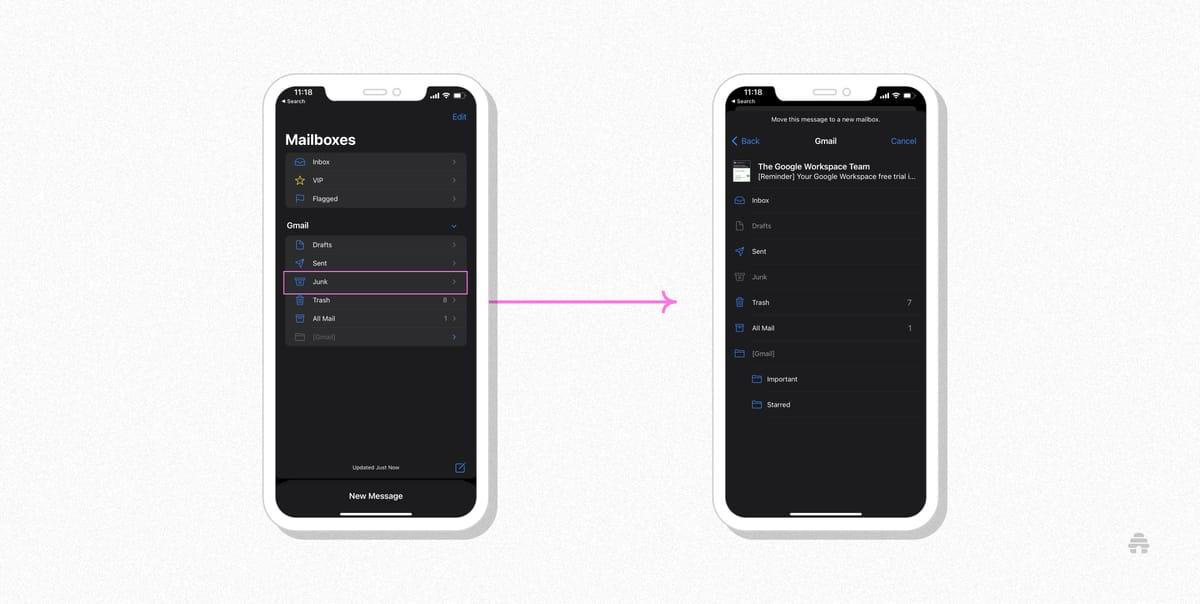
4. Click the folder icon at the bottom of the screen.
5. Select the Inbox or folder in which you want future messages to land.
Safelisting in Outlook
Outlook uses slightly different terminology. Is “safelist” the same as “safe sender”? Yes.
(For all of you grammarians out there, fine. Grammatically, they're different, but the function is the same.)
For Outlook, Windows Live Mail, Hotmail, and MSN Mail, you'll need to sign in to your Outlook account. Then, you can add the address to your safe senders.
Click the cog icon in the top-right corner and select "More mail settings."
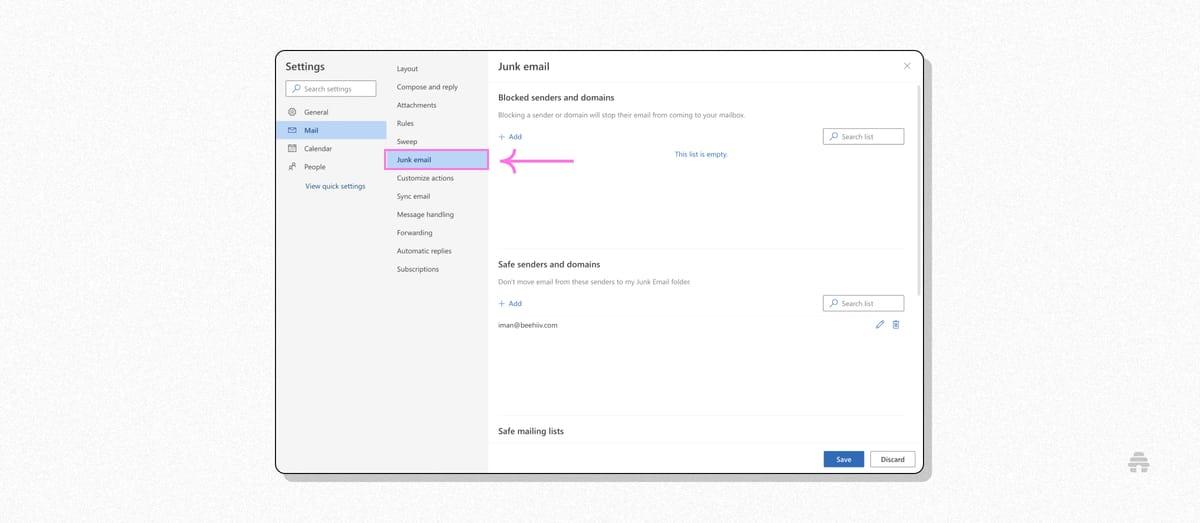
Select "Junk Email."
There will be two lists: "Blocked senders and domains" and "Safe senders and domains." Under "Safe senders," click add.
Type in the domain of the email (e.g., example.com) you want to safelist.
Safelisting in Yahoo!
In Yahoo! Mail, you can either add the contact (see above) or create a filter as follows:
Hover over the "Settings" icon and select "Settings."
Click on "Filters."
Click "Add" and enter a filter name.
Enter the domain of the email you want to safelist in the "Sender" field.
Select "Inbox" as the destination folder.
Click "Save" and then click "Save" again.
Stay In Touch With Fans, Friends, and Creators
Safelisting senders helps ensure that email newsletters reach their intended readers. Make sure to review your settings periodically to keep them current.
Creators, you should also make sure that you're doing everything to ensure deliverability. It takes two to virtually tango. Stay compliant with both legal regulations and industry best practices to keep the path to your subscribers' inboxes clear.
And readers, we hope this helps you access your beehiiv publications and all of the other emails you need. We know how fantastic the newsletter creators in the hive are — here's how to let them into your inbox.
Email service providers (ESPs) are constantly working to provide their users with the best email experience. Part of that task is ensuring that the messages in front of users’ eyeballs are the most relevant, desired ones while spam and low-quality promotional messages get filtered.
This is a constant balancing act that ESPs carry out in the background. Most users never consider this process until something goes wrong. For example, a message they want to receive is incorrectly categorized and ends up in the dreaded spam filter. Fortunately, properly safelisting emails from trusted sender is a quick and easy one-time process that can help ensure that you’re kept up-to-date with the content you subscribe to.
Apple Mail
Mac
Select Mail → Preferences from the menu bar in the Mac Mail app.
Click the Rules tab → Add Rule.
Type a name in the Description field, such as "safelist: beehiiv," to identify the rule we’re going to add.
Make sure the criteria read If any of the following conditions are met and that the From field is followed by Ends with.
Enter the domain name you want to safelist in the field next to the Ends with field. Add an @ sign before the domain name to make the filter specific. For example, to safelist all mail from the beehiiv.com domain, type "@beehiiv.com" into the field.
In the Perform the following actions section, set the three fields to Move Message, to the mailbox, and Inbox or a different target folder.
To save this rule click the Ok button.
Success! Now you’re ready to go.
To save this rule click the Ok button.
Success! Now you’re ready to go.
iOS Mail App

Open the Mail App
Select the relevant mailbox, then the Junk folder
Select the email you want to move to the inbox
Click the folder icon at the bottom of the screen
Select the Inbox folder you want future messages to go to:
Gmail
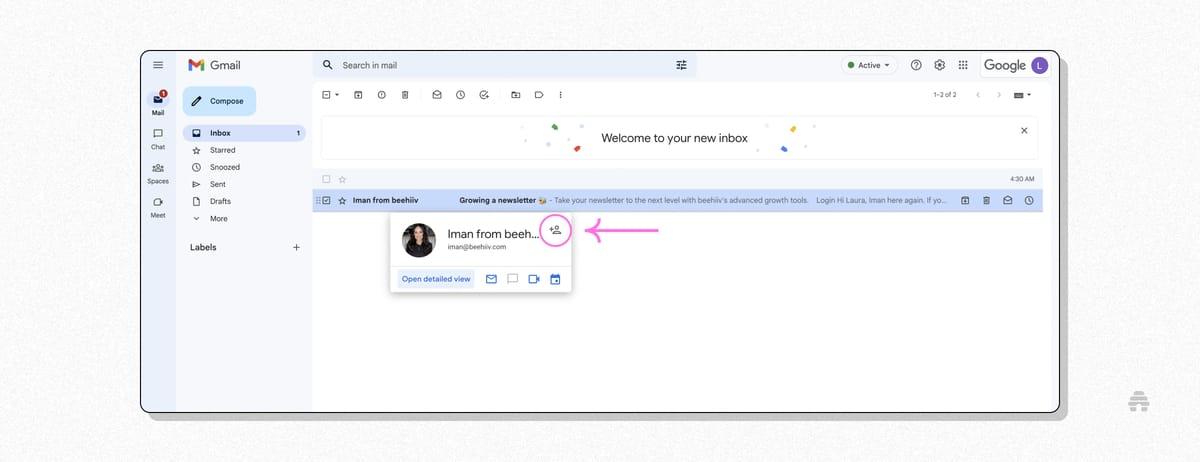
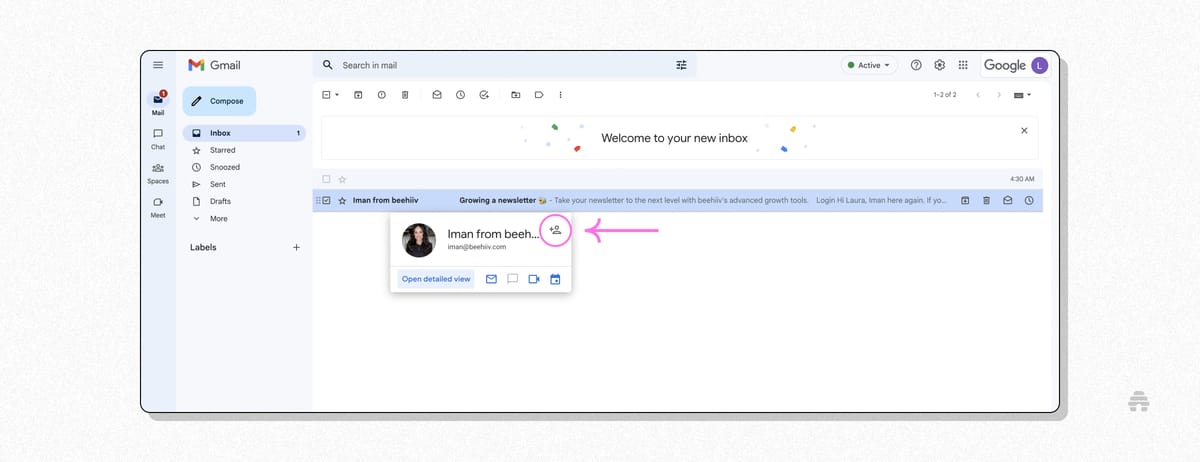
Add the address to your contacts
Add the email address that you want to safelist to your Gmail contacts by hovering over the sender’s name and click the “+” icon (see below):
Mark messages as ‘Not spam’
If Gmail has a newsletter as spam that you would like to go to your main inbox, you can tell Google not to mark a send as spam like this:
Navigate to the Spam folder.
Search for emails containing the domain you wish to safelist (eg example.com).
Select all the emails shown.
Click More and then Not Spam.
Create a filter for the address
This is the most complicated option but will be the most effective at ensuring you receive newsletters in your inbox:
Click the gear icon in the top-right corner, and then See All Settings
Click on Filters and then Create a new filter
Enter the domain of the email you want to safelist in the From field.
Click Create filter with this search
In the box headed When a message arrives that matches this search, select:
Never send it to spam
Categorize as Primary
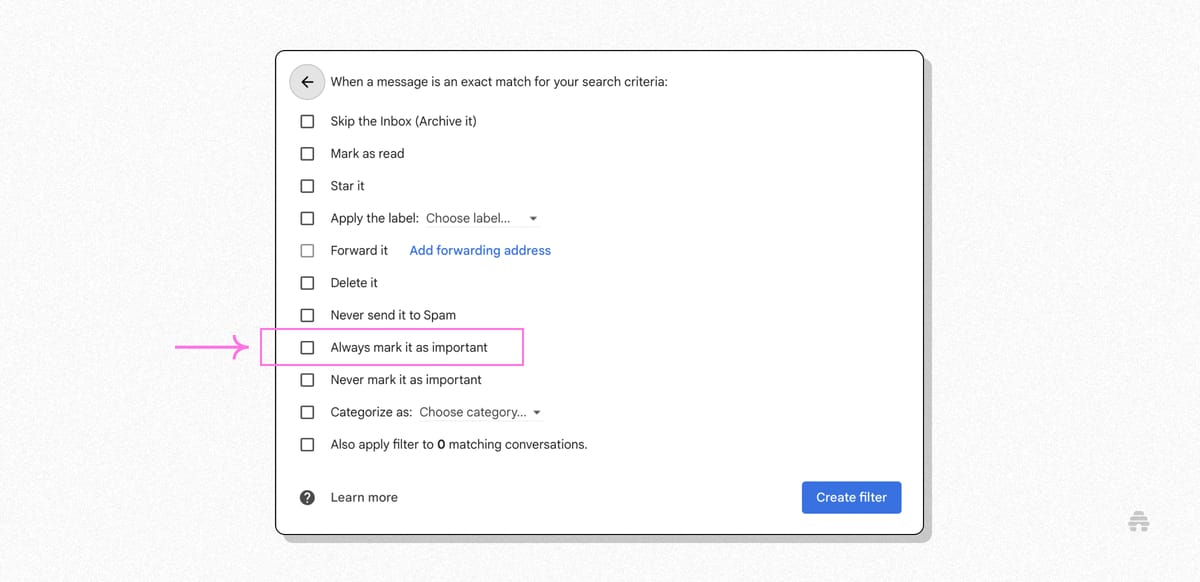
Click the “Create filter” button
Outlook
For Outlook.com, Windows Live Mail, Hotmail, and MSN Mail sign in to your account at Outlook.com and do the following:
Add the address to your contacts
Add the email address that is sending you an email (e.g. [email protected]) to your Outlook.com Contacts:
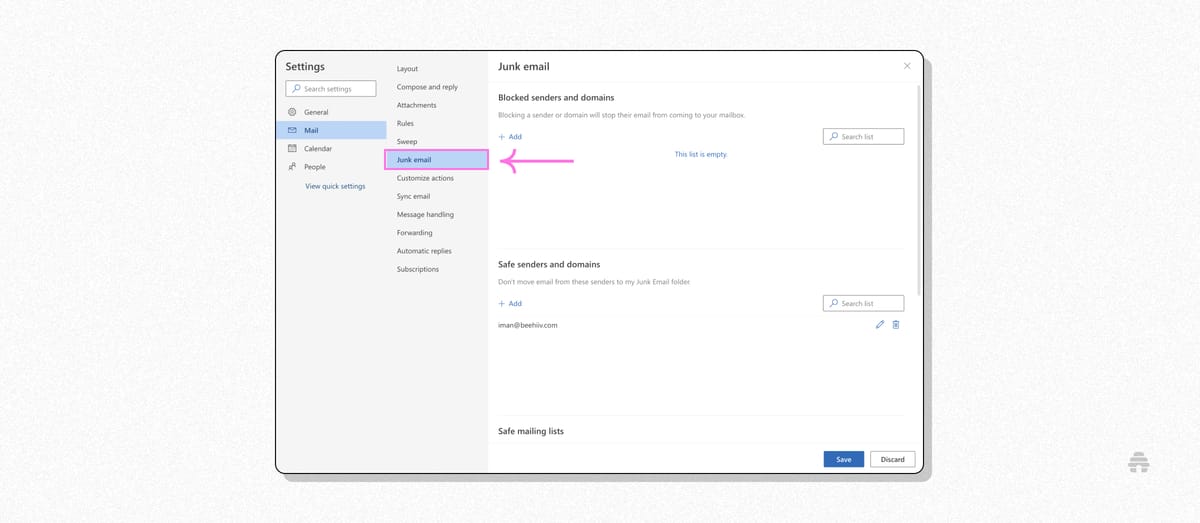
Add the address to your safe senders
Click the cog icon in the top-right corner and then More mail settings
Select Safe and blocked senders and then Safe senders
Add the domain of the email (eg example.com) you want to safelist to the list of safe senders
Click the cog icon in the top-right corner and then More mail settings
Select Safe and blocked senders and then Safe senders
Add the domain of the email (eg example.com) you want to safelist to the list of safe senders
Yahoo!
Sign in to your account at Yahoo! Mail and do the following:
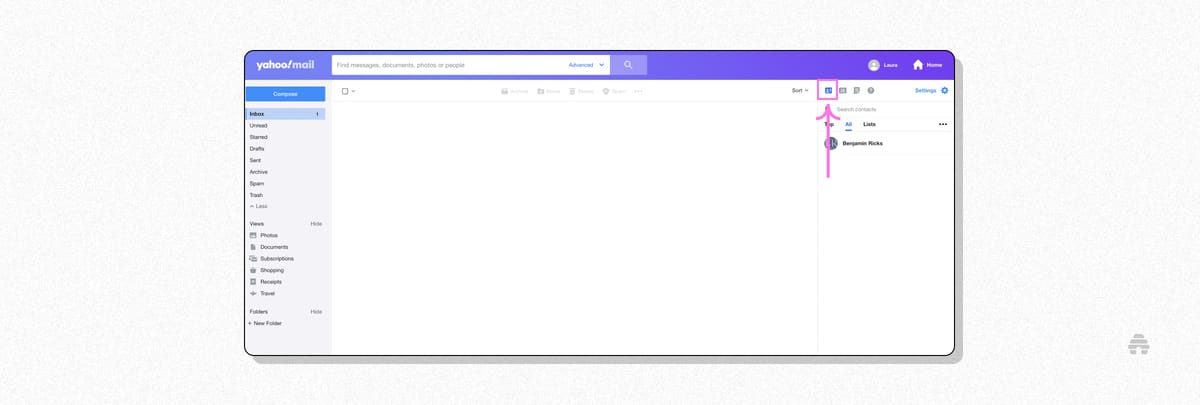
Add the address to your contacts
Add the email address that is sending you an email (eg [email protected]) to your Yahoo! Mail Contacts by clicking on the contacts icon:
And clicking Add a new contact:

Create a filter for the address
Mouse over the Settings menu icon and select Settings
Click Filters and then Add
Enter a filter name
Enter the domain of the email you want to safelist in the Sender field, or
Select Inbox as the folder to deliver the email to
Click Save and then click Save again
And that’s a wrap!
I hope this guide helped you navigate through the process of safelisting on different emailing services.
If you are considering starting a newsletter though, try out beehiiv!
Why? You can start for free, have access to 3D analytics to keep track of your performances and a lot more!
Happy emailing!

